Signify Guides
Signify Contacts: How to Add, Organize, and Manage Your Contacts
Signify Contacts is your digital contact book for keeping professional connections easy to find and follow up with. Add another Signify user's card, keep notes and tags, assign your own card to a contact, and stay up to date as their Signify profile changes.
Why Signify Contacts is different: when you save another Signify user's card, the contact stays connected to their Signify profile instead of becoming only a one-time copy of their information.
What Is Signify Contacts?
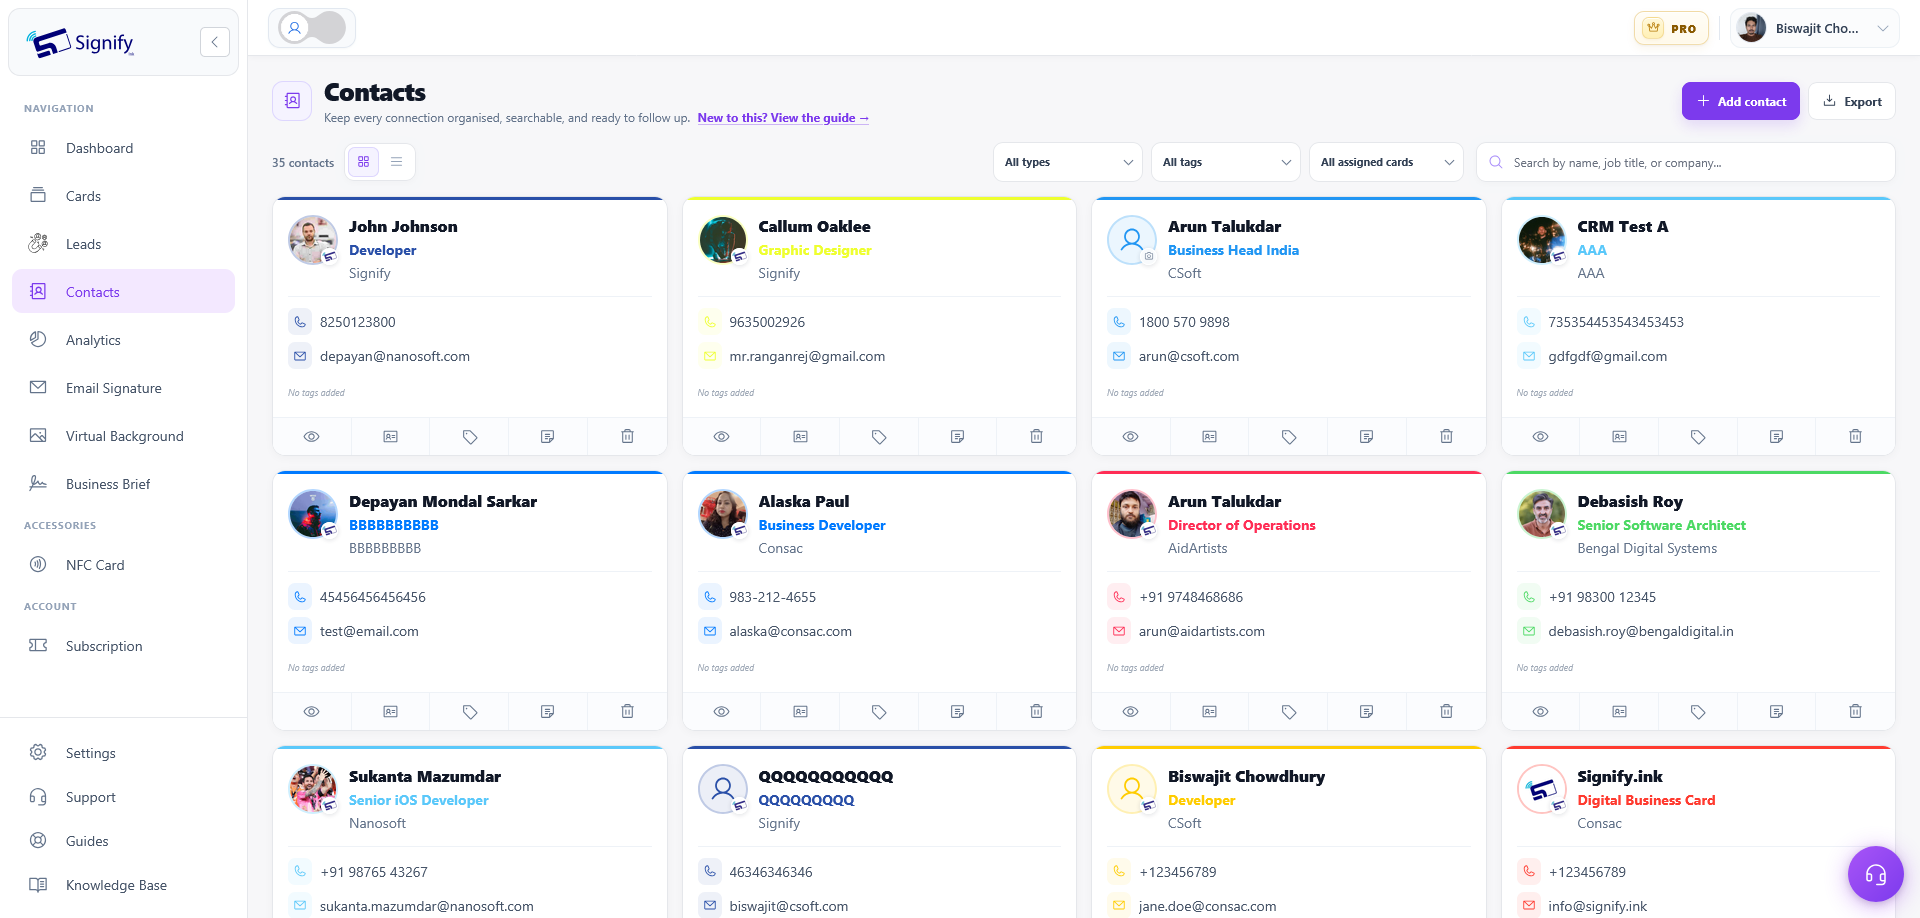
Signify Contacts is built to help you manage professional relationships around your digital business card network. Instead of relying only on a traditional phone contact list, you can save Signify cards, organize people with tags and assigned cards, add follow-up notes, and search your contacts by professional information.
Your Contacts list can include several contact types, including Signify contacts, scanned contacts, and saved leads.
How to Add a Contact on Desktop
On desktop, you can save another person's Signify card by loading their shared card URL.
From the same review screen, you can also choose Send lead to send one of your own Signify cards to that person.
Contact vs. lead: saving their card adds their information to your Contacts. Sending a lead sends one of your own Signify cards back to them. These are separate actions.
How to Add a Contact on Mobile
On mobile, Signify gives you several ways to add a contact depending on how you receive their card.
Scan a Signify QR code
Open Contacts, select Scan, and scan the other person's Signify card QR code. Their public card can then be reviewed and saved to your contact list.
Paste a shared card link
Select Add contact, paste the person's shared Signify card URL, load the card, review the information, and save it.
Tap a Signify NFC card
Tap their NFC-enabled Signify physical card with your phone. Their public digital business card opens, and you can select Save Contact to add it to your Contacts.
No matter which method you use, review the loaded card details before saving the contact.
Signify Contacts Stay Current
A saved Signify contact is linked to the person's Signify card rather than being only a static copy of their information.
When they update their Signify card, your contact view can reflect the latest available information, including their name, job title, company, phone number, email address, and profile image.
This means your Contacts list can stay useful even when the people you know change roles, companies, contact details, or profile images.
Connected to the source: saving a Signify card means you can continue to see updated professional information instead of depending on an old manually entered version.
Organize and Find Your Signify Contacts
As your network grows, Signify Contacts gives you several ways to organize and find the people you need.
Tags
Use color-coded labels to group contacts into categories such as Clients, Follow up, or other groups that match your workflow. Tags are a Pro feature.
Assigned card
Choose which of your Signify cards is associated with a contact. For example, you can assign someone to your Personal, Freelance, or Work card, then filter your contacts by that assigned card later.
Notes
Add private reminders and follow-up context directly to a contact so important details stay with the relationship. Notes are a Pro feature.
Search
Search your Contacts by name, job title, or company to quickly find the person you need.
Filters
Narrow the contact list by contact type, tag, or assigned card. Contact types include Signify contacts, scanned contacts, and saved leads.
Grid and list views
Choose the layout that works best for you. Use grid view for visual browsing or list view when you want a more compact overview of your contacts.
Understand the Contact Types in Signify
Your Contacts list can contain people added through different Signify workflows. Understanding the contact type helps you know where each connection came from.
| Contact type | How it gets added | What it represents |
|---|---|---|
| Signify contact | Saved from another user's Signify card | A connection linked to a Signify digital business card |
| Scanned contact | Added through the scanning workflow | A contact captured through a Signify scanning process |
| Saved lead | Created when a Signify card lead is saved as a contact | A lead that has been accepted into your Contacts |
Export Your Signify Contacts
Signify also lets you export the contact list currently displayed on screen as an Excel file.
The export can include contact details along with associated tags and notes, making it useful when you need to review, organize, or work with your contact information outside Signify.
Tips for Managing Your Signify Contacts
- Save cards as soon as you meet people: use QR scanning, shared links, or NFC to avoid losing useful connections.
- Use assigned cards: separate personal, freelance, and work relationships according to the Signify card you use with them.
- Add notes for follow-up: keep useful context with a contact instead of relying on separate reminders.
- Use tags for larger networks: group contacts by relationship or follow-up stage when your network grows.
- Use search and filters: quickly narrow the list instead of manually browsing through every contact.
- Export when needed: download the displayed contact list to Excel when you need a portable copy of your contact information.
Signify Contacts FAQ
How do I add a Signify contact?
On desktop, open Contacts, select Add contact, paste the person's Signify card link, load it, review the details, and select Save contact. On mobile, you can also scan their QR code or tap their NFC-enabled Signify card.
Can I add a contact without their Signify card link?
Yes. On mobile, you can scan their Signify QR code or tap their NFC-enabled Signify physical card to open their public card and save it.
Do Signify contacts update when the person changes their card?
Yes. A saved Signify contact is linked to the person's Signify card, so updated profile information such as their name, job title, company, phone, email, and profile image can be reflected in your contact view.
Can I organize Signify contacts with tags?
Yes. You can use color-coded tags to organize contacts into groups such as Clients or Follow up. Tags are a Pro feature.
What does an assigned card do?
An assigned card lets you associate one of your own Signify cards with a contact. You can then filter contacts by that card, such as your Personal, Freelance, or Work card.
Can I add private notes to a Signify contact?
Yes. You can keep reminders and follow-up context on a contact. Notes are a Pro feature.
Can I export my Signify contacts?
Yes. You can download the displayed contact list as an Excel file. The export includes contact details, tags, and notes.
Keep Your Professional Network Organized
Signify Contacts brings your professional connections, updated card information, tags, notes, assigned cards, and follow-up workflow into one place.
Save the people you meet, organize your growing network, and keep important professional details easy to find whenever you need them.